Netgear Extender Setup and Quick mywifiext.Net Troubleshooting
Getting a reliable internet connection across every corner of your home or office is necessary in today’s world. However, it is quite easier with the range extender, as these networking devices help to make streaming or gaming hassle-free. Likewise, the Netgear range extenders are one of the most efficient and reliable options to enjoy seamless connectivity within your premises via a quick Netgear Extender Setup process.
Whether you want to implement the Netgear wifi range extender for the first time or want to enhance your existing network coverage, you must undergo the Mywifiext.Net Setup. Therefore, this page is focused on elaborating the quick steps to set up the Netgear repeater in different ways. Along with this, our quick troubleshooting guide will give you an overview of the common Mywifiext Setup errors and expert tips to fix them. So, let’s get started!
Beginning With the Netgear Extender Setup
Before diving into How To Setup WiFi Range Extender Netgear, you must know some basic things. First of all, it is essential to collect all the requirements for the Netgear extender setup, including:

A Netgear range extender

Existing wifi router or modem

Stable internet connection

Correct web/IP address

Default login credentials and SSID, and password

Netgear Nighthawk app

A compatible smartphone

Ethernet cable, power adapter, etc.
After acquiring all these things, you must consider a few things to make the most of your device. Here are the key considerations:
- Most importantly, you must check the compatibility of your devices with each other.
- Then, choose the right location to place your extender, halfway between your router and the dead zones.
- After that, inspect and confirm the power supply in your local area.
- Next, make sure your device has the latest firmware version that is compatible with your device.
- Keep your browsers and apps updated and download them from the official resources only.
Finally, you are all set to begin with the Netgear WiFi Extender Setup.
How To Setup Netgear WiFi Extender in Different Ways?
Generally, there are multiple ways to set up the Netgear wifi range extender: WPS button, the Nighthawk app, and the web interface method. However, each method has simple steps through which you can optimize your overall internet experience. If you are interested in learning How Do I Setup A Netgear WiFi Extender in these methods, follow the instructions below:
Netgear Extender Setup Via Web Interface
- First of all, connect your existing router to the internet modem and note its wifi SSID and password.
- If your device has different modes of operation, set it to “Extender”.
- Next, plug your range extender into a power outlet in the same room as your router.
- Check the LED indicator or press the Power or ON/OFF button on your extender.
- After powering it on, connect your computer to the extender’s default wifi network.
- Hereon, you can either opt for the Ethernet connections or use the default wifi network name and password.
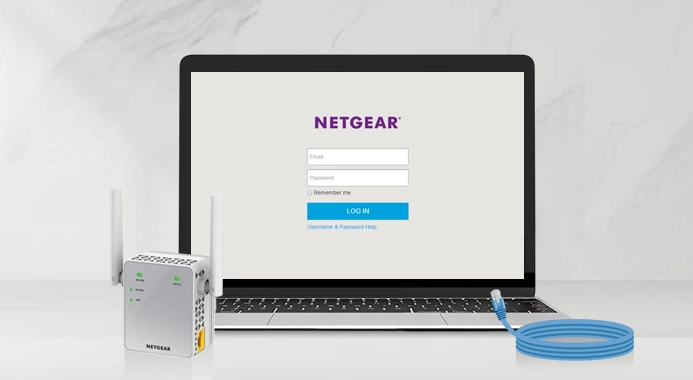
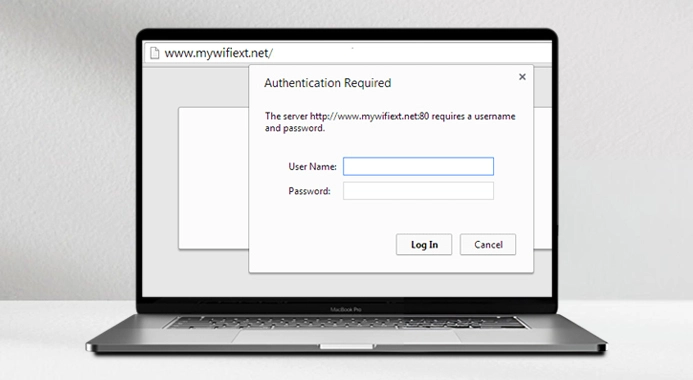
- Then, open any web browser and log in to your account via mywifiext.com.
- Next, the New Extender Setup page opens on your screen.
- Here, click “Agree” or “Yes” and then choose your administrative username and password.
- Now, the Netgear wifi range extender searches for the wifi network to extend.
- If it detects your router’s network automatically, connect through your router’s SSID and password.
- Next, choose your wifi network name and enter its password to join your devices.
- Further, customize these default wifi credentials and set a password for it to secure your network.
- Now, connect your device to the new extended network using your wifi details.
- Finally, you can move your extender to your preferred location, near the router or dead zones.
- Ultimately, the Mywifiext.Net Setup is finished.
- Note: If you want to set up Parental Controls, Guest Network, Internet Settings, Wireless settings, etc., on your extender, follow the setup wizard.
How Do I Setup A Netgear WiFi Extender Via the Nighthawk App?
- Initially, make sure your wifi router is connected to a stable internet.
- Further, go to the Wi-Fi settings of your smartphone and connect it to the extender’s network.
- Now, set your device as an “Extender”.
- Further, download the “NETGEAR Nighthawk WiFi Router” app on your smartphone.
- After that, launch the app and log in to your Netgear administrative account.
- Then, you will reach the smart home dashboard of the app.
- Next, go to the Menu and select “Set Up A New Nighthawk System” and then get started.
- Hereon, select your device as a “Range Extender” and plug it into the same room as your wifi router.
- Now, the app will automatically detect the Netgear Extender network and attempt to connect to it.
- On the Choose Network page, select “NETGEAR_EXT” network SSID and enter the same password as your router’s network.
- Further, personalize your wifi settings and choose the network you want to extend (2.4 GHz or 5 GHz).
- Hereon, you can choose the same wifi credentials as your router for the extender’s network.
- After connecting to the internet, you will land on the “Set Up Administrator Login” page.
- Here, you can set your admin username and password for your range extender.
- You can also answer two security questions to ensure the security of your network.
- If there are any automatic firmware updates prompting on the screen, update them.
- After that, your device is ready to extend the existing wifi signals.
- Further, you can customize and configure the extender settings, such as Parental Control, Guest Access, as per your preferences.
Netgear Extender Setup Through the WPS Button
- Primarily, power on your wifi range extender near the wifi router.
- Then, wait for the power LED to stop blinking, and then power it on again.
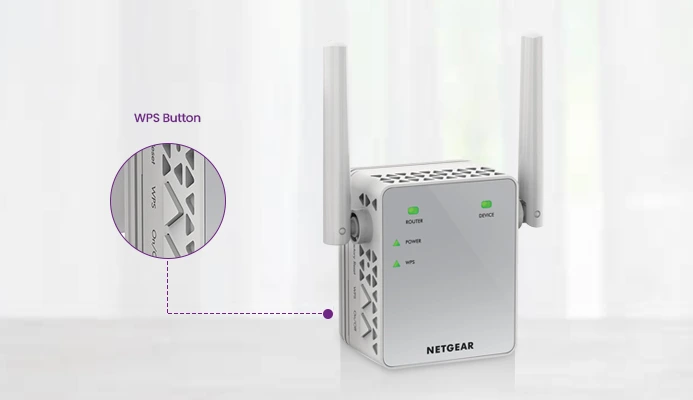
- After that, find the WPS button on your range extender as well as on the router.
- Now, press the WPS button on the router and extender simultaneously within 2 minutes.
- Further, wait till the LED indicators appear on your device.
- Let your device complete its reboot and then connect your device to the extender’s network.
- Then, customize your wifi network name and password.
- Now, your device is ready to extend your existing wifi signals.
- Lastly, the Netgear WiFi Extender Setup is completed.
Is Your www Mywifiext Net Setup Failed? Try these Quick Tips!
Sometimes, users get a lot of issues or even fail to access the Netgear Extender Setup wizard, especially when using the www.mywifiext.net Setup page. Mainly, these setup failures occur due to internet connectivity issues, incorrect login details, technical issues, and firmware failures etc.
Thus, if your Netgear Extender Setup is not starting, or you are not able to log in to the Mywifiext Net Setup Wizard, here are some simple solutions to get you back online:
- Before beginning the Netgear Extender Setup process, make sure that the extender is correctly plugged in and connected to your router.
- Make sure your device is getting a sufficient power supply. Cross-verify your cable connections and securely join them to the power source.
- It is always important to enter the correct web address, i.e., www.mywifiext.net, for the Netgear extender.
- If the www.mywifiext.net Setup page fails to load, you can use the 192.168.1 Netgear Smart Wizard to complete the setup.
- Additionally, clear the browser cache and cookies for a seamless login process.
- Moreover, update your app and web browser regularly to access the mywifiext net setup wizard.
- Check the default username and password to continue with the Netgear Extender Setup.
- Most importantly, reboot your router, extender, and the gadget you are using to access the 192.168.1 Netgear Smart Wizard.
- Ensure regular firmware updates on your range extender and remove the corrupted files.
- In addition, make sure you are using the 2.4 GHz frequency band. Additionally, verify the extender settings and save all the settings.
- At last, when nothing works, factory reset the Netgear extender to eliminate all the Netgear WiFi Extender Setup issues.
In case these tips do not resolve the problem, reset the extender and repeat the mywifiext net setup wizard.
Above all, by following this quick Netgear Extender Setup guide, you can master your extender settings. If you still have any issues, reach out to us!
FAQs
Why can’t my Netgear extender detect the 5 GHz WiFi band?
If you are unable to detect or connect to the 5 GHz band on your Netgear range extender, it means the 5GHz band is disabled on your device. Sometimes, your device model may not be compatible with this wifi band.
What is the ideal place to install my Netgear range extender?
Indeed, a proper placement of your device is essential for the seamless performance and uninterrupted wifi signals. Usually, you should place your extender halfway between your router and the dead zone at a suitable height.
My Netgear wifi range extender isn't connecting to my router. What should I do?
If your Netgear range extender is not connecting to your existing wifi router, then you must try power cycling both devices. If still unable to connect your devices, verify your wifi name and password, or factory reset as a last resort.
Is it necessary to reconfigure my Netgear extender if I change my router’s Wi-Fi password?
Yes. You will lose connection with your extender when you change the Wi-Fi password of your router. To do this, you will have to go to the settings page of the extender ( mywifiext.net ) and change the settings to use a new password.